Getting Started with AWS Lightsail: Things You Need to Know Before Starting

Introduction
AWS Lightsail is, by far, one of the most user-friendly and powerful services offered by Amazon Web Services. It's designed to simplify cloud computing for developers, small businesses, and anyone who wants to deploy applications quickly without the complexity of traditional AWS services. If you're new to Lightsail or considering using it, here's everything you need to know to get started.
 Fig: AWS Lightsail Logo
Why AWS Lightsail Stands Out?
AWS Lightsail is often praised for its simplicity and ease of use. Unlike other AWS services like EC2 or Elastic Beanstalk, which come with a steep learning curve, Lightsail is designed to be intuitive and straightforward. Here's why it's so loved:
-
Simplicity: Lightsail provides a clean, easy-to-navigate interface that allows you to launch instances, containers, databases, and more with just a few clicks.
-
Affordability: It offers predictable pricing, making it ideal for small projects, startups, or anyone on a budget.
-
Pre-configured Environments: Lightsail comes with pre-configured blueprints for popular applications like WordPress, LAMP, Node.js, and more, saving you time on setup.
-
All-in-One Solution: From virtual machines to storage, databases, and networking, Lightsail bundles everything you need in one place.
Key Features of AWS Lightsail
Here are some of the standout features that make Lightsail a go-to choice for many:
1. Instances
Launch virtual servers (instances) in minutes. Choose from a variety of pre-configured blueprints or create your own custom setup.
2. Containers
Easily deploy and manage containerized applications using Lightsail's container service.
3. Databases
Set up managed databases like MySQL or PostgreSQL with just a few clicks.
4. Snapshots
Take snapshots of your instances or databases for backup or cloning purposes. This is especially useful when your system is unresponsive or you need to recover quickly.
5. Static IPs
Attach a static IP address to your instance, ensuring it remains the same even after a restart.
6. Networking
Manage firewalls and networking rules directly from the Lightsail console without needing to use custom commands like ufw.
7. Load Balancers
Distribute traffic across multiple instances to ensure high availability and scalability.
8. Storage
Attach additional block storage to your instances for extra capacity.
Why Lightsail is Perfect for Beginners and Small Projects
If you're new to cloud computing or working on a small project, Lightsail is an excellent choice. Here's why:
1. No Complex Configuration
Unlike EC2, where you need to configure VPCs, subnets, and security groups, Lightsail abstracts these complexities, allowing you to focus on your application.
2. Predictable Pricing
Lightsail offers fixed monthly pricing, so you don't have to worry about unexpected costs.
3. Quick Deployment
With pre-configured blueprints, you can deploy applications like WordPress, Joomla, or Magento in minutes.
4. Scalability
While Lightsail is designed for simplicity, it also allows you to scale your resources as your project grows.
Getting Started: Step-by-Step Guide
Step 1: Create Your AWS Account
If you don't have an AWS account, sign up at aws.amazon.com. You'll get access to the AWS Free Tier, which includes some Lightsail credits.
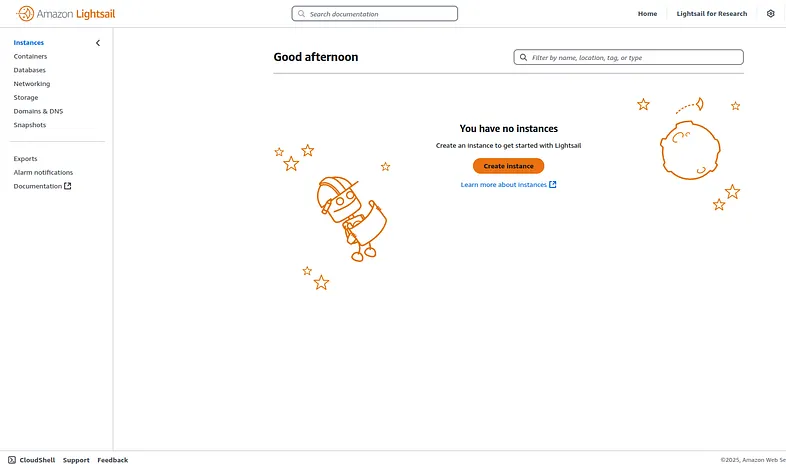
Step 2: Access Lightsail Console
Navigate to the Lightsail console from your AWS dashboard or directly at lightsail.aws.amazon.com.
Step 3: Choose Your Instance Plan
Lightsail offers various plans starting from $3.50/month:
- $3.50/month: 512 MB RAM, 1 vCPU, 20 GB SSD
- $5/month: 1 GB RAM, 1 vCPU, 40 GB SSD
- $10/month: 2 GB RAM, 1 vCPU, 60 GB SSD
- And more powerful options available
Step 4: Select a Blueprint
Choose from:
- OS Only: Linux distributions like Ubuntu, Amazon Linux, CentOS
- Apps + OS: Pre-configured applications like WordPress, Node.js, LAMP, etc.
Step 5: Configure Your Instance
- Choose your instance location (region)
- Configure networking (firewall rules)
- Add a key pair for SSH access
- Name your instance
Step 6: Launch Your Instance
Click "Create instance" and wait for it to be ready (usually takes 1-2 minutes).
Pricing Comparison
| Plan | RAM | vCPU | Storage | Transfer | Price/Month |
|---|---|---|---|---|---|
| Micro | 512 MB | 1 | 20 GB SSD | 1 TB | $3.50 |
| Small | 1 GB | 1 | 40 GB SSD | 2 TB | $5.00 |
| Medium | 2 GB | 1 | 60 GB SSD | 3 TB | $10.00 |
| Large | 4 GB | 2 | 80 GB SSD | 4 TB | $20.00 |
| XLarge | 8 GB | 2 | 160 GB SSD | 5 TB | $40.00 |
Tips for Getting the Most Out of AWS Lightsail
1. Use Snapshots for Backup
Regularly take snapshots of your instances and databases. This ensures you have a backup in case of failure or accidental deletion.
# Access your instance via SSH
ssh -i your-key.pem user@your-instance-ip

# Create a snapshot via Lightsail console or CLI
aws lightsail create-instance-snapshot --instance-name your-instance --instance-snapshot-name backup-$(date +%Y%m%d)
2. Attach a Static IP
Always attach a static IP to your instance to avoid losing access when the IP changes.
3. Leverage Managed Databases
If you're running a database-driven application, use Lightsail's managed database service to offload maintenance tasks like backups and updates.
4. Monitor Usage
Use Lightsail's built-in monitoring tools to keep track of your resource usage and avoid overages.
5. Explore Blueprints
Take advantage of the pre-configured blueprints to save time on setup and deployment.
6. Avoid Custom Firewall Commands
Lightsail manages firewalls through its networking tab. Avoid using custom commands like ufw to prevent conflicts.
Real-World Use Cases for AWS Lightsail
1. Web Hosting
Host websites, blogs, or e-commerce platforms using pre-configured blueprints like WordPress or Magento.
Example Setup for WordPress:
# After launching WordPress blueprint
1. Access your instance IP in browser
2. Complete WordPress setup wizard
3. Configure your domain (optional)
4. Install SSL certificate via Let's Encrypt
2. Development and Testing
Use Lightsail as a sandbox environment for testing new applications or features.
3. Small Business Applications
Deploy business applications like CRM, ERP, or custom tools without the need for complex infrastructure.
4. Personal Projects
Whether it's a portfolio website, a hobby project, or a learning experiment, Lightsail is perfect for personal use.
Lightsail vs Other AWS Services
| Feature | Lightsail | EC2 | Elastic Beanstalk |
|---|---|---|---|
| Complexity | Low | High | Medium |
| Pricing | Fixed monthly | Pay-as-you-go | Pay-as-you-go |
| Setup Time | Minutes | Hours | Medium |
| Scalability | Limited | Unlimited | High |
| Best For | Small projects | Enterprise | Web applications |
Common Lightsail Blueprints
WordPress
Perfect for blogs and content websites:
# Pre-installed components:
- WordPress (latest version)
- Apache web server
- MySQL database
- PHP
- phpMyAdmin
LAMP Stack
For custom PHP applications:
# Includes:
- Linux (Ubuntu)
- Apache
- MySQL
- PHP
Node.js
For JavaScript server applications:
# Pre-configured with:
- Node.js (latest LTS)
- npm
- Express.js ready
Migrating from Other Platforms
From Shared Hosting
- Export your website files and database
- Launch appropriate Lightsail blueprint
- Upload files via SFTP
- Import database
- Update DNS records
From DigitalOcean
- Create snapshot of your droplet
- Download and convert to compatible format
- Upload to Lightsail
- Launch instance from snapshot
Security Best Practices
1. Use Key-Based Authentication
# Generate SSH key pair
ssh-keygen -t rsa -b 4096 -f ~/.ssh/lightsail-key

# Add public key to Lightsail instance
# Disable password authentication
sudo sed -i 's/PasswordAuthentication yes/PasswordAuthentication no/' /etc/ssh/sshd_config
sudo systemctl restart ssh
2. Configure Firewall Rules
- Only open necessary ports
- Restrict SSH access to your IP
- Use HTTPS for web applications
3. Regular Updates
# For Ubuntu/Debian
sudo apt update && sudo apt upgrade -y

# For Amazon Linux/CentOS
sudo yum update -y
4. Enable Automatic Backups
Set up automatic snapshots through the Lightsail console or AWS CLI.
Troubleshooting Common Issues
Instance Won't Start
- Check instance health in console
- Review system logs
- Try reboot from console
- Contact AWS support if needed
Can't Connect via SSH
- Verify security group rules
- Check if static IP is attached
- Ensure SSH key is correct
- Try browser-based SSH from console
Application Not Loading
- Check if application service is running
- Verify firewall rules allow HTTP/HTTPS
- Check application logs
- Ensure domain DNS is pointing correctly
Final Thoughts
AWS Lightsail is a game-changer for anyone looking to simplify cloud computing. Its intuitive interface, predictable pricing, and powerful features make it an ideal choice for beginners and small projects. Whether you're hosting a website, testing a new application, or running a small business, Lightsail provides everything you need to get started quickly and efficiently.
Key Takeaways:
- Start Small: Begin with the $5/month plan for most small projects
- Use Blueprints: Save time with pre-configured applications
- Backup Regularly: Take advantage of snapshots for peace of mind
- Monitor Costs: Predictable pricing helps with budgeting
- Scale When Needed: Upgrade your plan as your project grows
So, why wait? Dive into AWS Lightsail today and experience the simplicity and power of cloud computing at your fingertips.
Whether you're a beginner taking your first steps into the cloud or an experienced developer looking for a simpler alternative to complex AWS services, Lightsail offers the perfect balance of simplicity, power, and affordability.